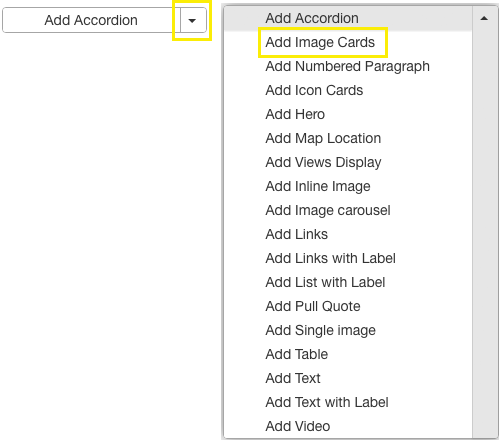
Add image cards
Image Cards allow you to add highlight boxes featuring an image with a link
IMPORTANT: Image Cards can only be created for Landing Pages
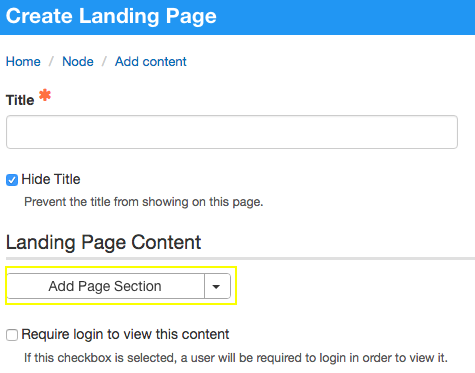
When creating Landing Page, click Add Page Section.
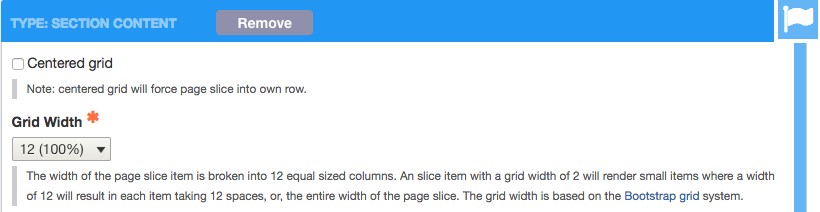
Set the grid width for the overall set of cards
Whatever you set here determines the total amount of screen width for the entire group of cards. See grid widths.
Select Add Image Card
Settings for the overall card group
[Optional] Enter a label for the card group.
This will appear centered on the group of Image Cards in blue large font.

Select a Card width.
- Remember, you already selected a Grid Width for the Page Section. The Card width will be applied living within the Page Section width you specified earlier.
- The Card Width specified is applied to all cards within the Card Group
- You cannot specify different card widths within the same Card Group

[Optional] Enter text for the card group.
- This will appear centered under the label for the group of Image Cards.
- It will render in smaller black font.

Select how individual image cards display corresponding text entered
- Display Options set apply to all cards within the Card Group
- You cannot specify different Display Options within the same Card Group

Click Add Image Card to start entering individual cards.

Settings for individual cards
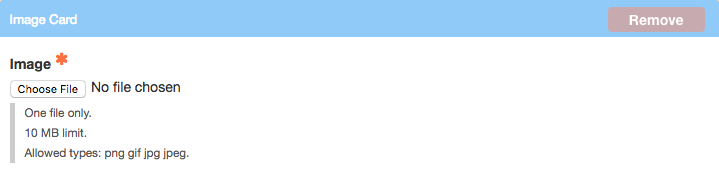
Click Choose File to browse to the image for the image card.
You will also need to enter ALT text once the image is selected.
NOTE: images will automatically be sized to fit the specific width chosen
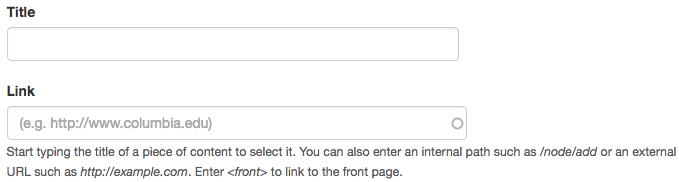
[Optional] Enter the Title for the card.
Titles appear centered on the individual card.
[Optional] Enter a link for the card.
This will create a link for the title entered.
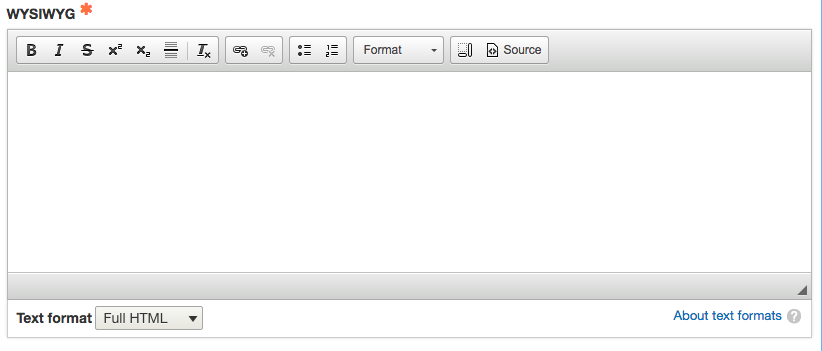
[Optional] Enter text to appear on the card.
This will appear under the title (if entered) and centered on the card.
Click Add Image Card to add additional cards.

Determining pixel width and height for images
If your images on the image cards do not have enough pixels in them, they will render as pixellated. So, how do you calculate how many pixels wide each image should be to avoid graininess?
- The full pixel width of the desktop screen is set to 1170px.
What this means to you:
- If your image card spans the entire screen, the image must be at least 1170 px wide
- If your image card spans half the screen, the image must be at least 585 px wide (1170 px / 2)
- If your image card spans one third of the screen, the image must be at least 390 px wide (1170 px / 3)
- Etc...
Troubleshooting cards that do not align
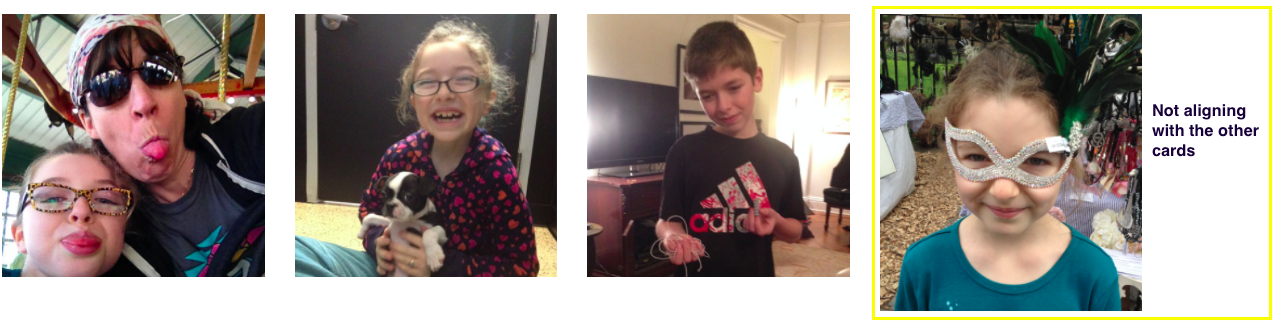
After viewing the published page you may notice that some of the images on your cards to not align within the group. This may or may not have been intended.
If this is not intended, don't worry. This is easily fixed!
If you want all the image cards to be the same size and shape, they must all be created in the same width and height pixel ratio.
In the example above, the first three cards have identical pixel ratios and the last card was created using a different ratio. Thus, they layout differently.
To fix this, you must re-create the images, in this example only the last card needs to be re-created, all to the same width/height ratios.
NOTES:
- There are many methods for creating images to the same ratios. Any method may be used.
- For this method, Adobe Photoshop is required.
- You must have all your images handy.
First, decide on a ratio all cards will use:
- Using Photoshop, size the first image (the "template") to the proportions you want for your image cards.
- Remember: the ratio itself does not matter. It is only important that all ratios for each image on the cards are identical.
- Save the template as a .jpg and place into an image card on your webpage.
- Keep resizing it in Photoshop until you are happy with the display on your webpage.
- This image's ratio serves as the template against which all the other images are set.
- Keep this file open. You will need it in the next steps.
Open the other images and scale them appropriately:
- In Photoshop, open the next image as a new file.
- This is done by selecting File > New.
- Copy the entire image and paste it into the original template photoshop file.
- This creates a new layer.
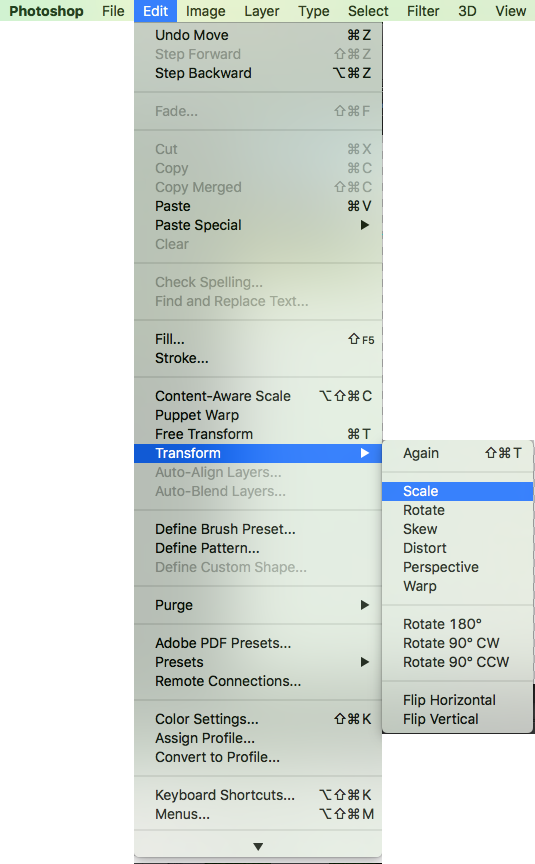
- Scale the image on it's separate layer as needed
- Scaling images is accessed under Edit > Transform > Scale
- Using the Move Tool, move the image layer so it is placed appropriately.

- Repeat this for all the images for your cards.
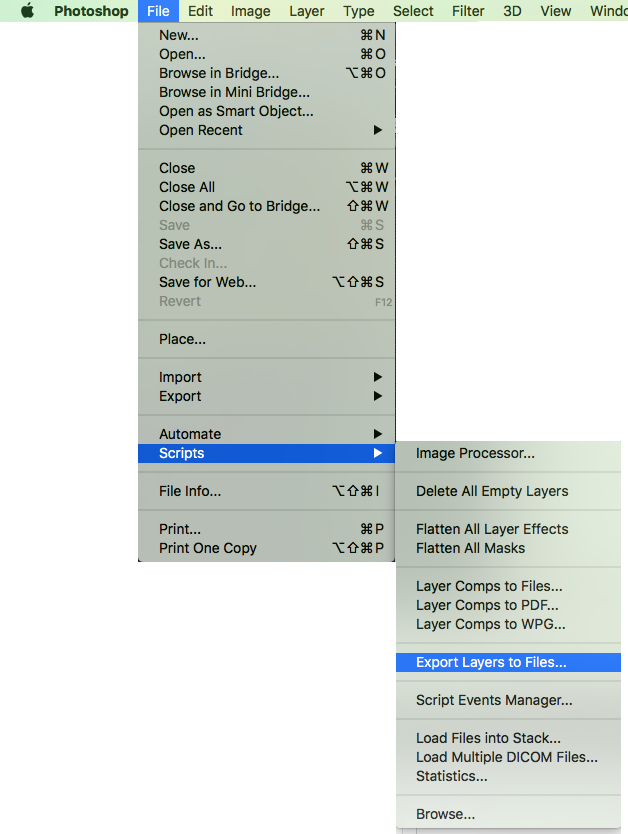
Save all layers as separate images:
- Photoshop comes with an Export Layers to Files script, saving the separate layers as individual image files:
- Run this script by selecting File > Scripts > Export Layers to Files
All your images are now the same ratio and will align perfectly for the image cards!