Document
Documents allow you to create important forms and documents as webpages that can include uploaded files such as PDFs and spreadsheets.
Definition
In Columbia Sites, the Document content type allows content managers to build policies, forms, and other content as web pages and also include files such as PDFs, Word documents, and Excel spreadsheets that can be uploaded and linked to the webpage. Each Document page is automatically aggregated in a Document Library for organized access and filtering.
Usage and Specifications
When to Use
- To build forms, policies, and other filterable content as webpages to make them easy to read, search, and filter
- To provide downloadable resources such as forms, reports, or guides
- To link to supporting documents and related site content
- To manage and display a collection of documents using the Document Library
Specifications
- Best practice is to build the content as webpages and attach files if this would be helpful to users.
- Supported file types: TXT, PDF, DOC, DOCX, XLS, XLSX, JPG, JPEG, PNG, GIF, PPT, and PPTX.
- Ensure all documents meet the University Accessibility Standard.
- Use descriptive link text that clearly indicates the purpose of the document.
- For uploaded files, create filenames with keywords to improve SEO.
Creating a New Document
Before building Document pages, first read the Document Library guide, which explains how to organize and create taxonomy terms for the Document content type. Once you've organized your documents and created the term IDs that will allow users to filter and search the library, you're ready to build the individual Document pages.
- In the administrative toolbar, navigate to Add Content and select Document.
Fill in the Title field with a clear, descriptive title for your page. Since this title also appears in the Document Library where users will search, the name should evoke the purpose of the document.
Check the "Featured Document" box to pin the document at the top of the Document Library.
Next, select the appropriate taxonomy terms for Document Categories and Topics. If you did not yet create taxonomy terms, do that before continuing.
Complete the Summary field with one or two concise sentences about the content, not to exceed 160 characters. This summary is also the default meta tag for the page; if you do not complete this field, search engines will have to guess about the content on your page.
Now add the content of your policy or document, if appropriate, into the relevant content paragraphs (Text, Accordion, Table, Webform, etc.).
Lastly, you can also include a downloadable version of your document if either a webpage isn't a suitable container for the content or if the uploaded document would be helpful to users.
Uploading a Document
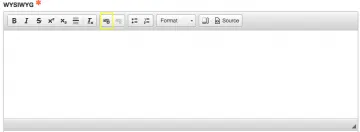
Within the WYSIWYG editor, click the link icon.
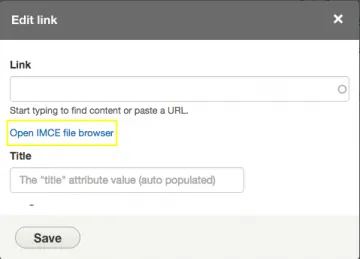
In the popup, click Open IMCE file browser.
We recommend creating a dedicated folder for Documents. Select the folder where you want to store your files and click Upload.
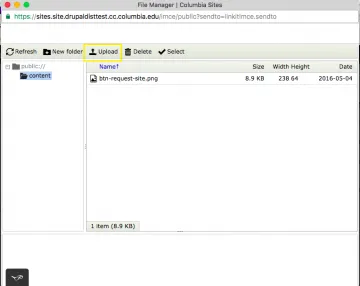
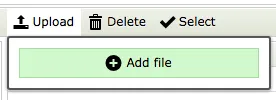
Click Add file, then browse to and select the document you want to upload.
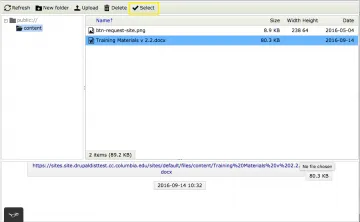
Link to a Previously Uploaded Document
Enter the desired link text in the WYSIWYG editor and highlight it.
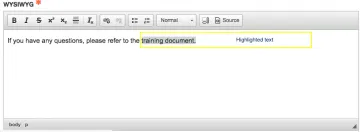
- Click the link icon in the WYSIWYG.
- In the popup, click the "Open IMCE file browser" link.
- Navigate to and highlight the previously uploaded document.
- Click Select.
The highlighted text is now a link to the selected document.